Bulk Actions on the Job List Page
Last updated: July 15, 2026
Bulk Actions let you apply changes to multiple jobs at once — saving time on repetitive tasks like adding labels, approving invoices, reassigning ownership, or updating job settings. Instead of editing jobs one by one, you can select them in bulk and apply your changes in a single step.
How to Use Bulk Actions
Step 1: Select your jobs
On the Job List page, click the checkbox next to each job you want to update. You can select as many jobs as you need.
Once you select one or more jobs, the Bulk Action toolbar appears at the top of the job list with three sections: Categorization, Workflow, and Job Settings.
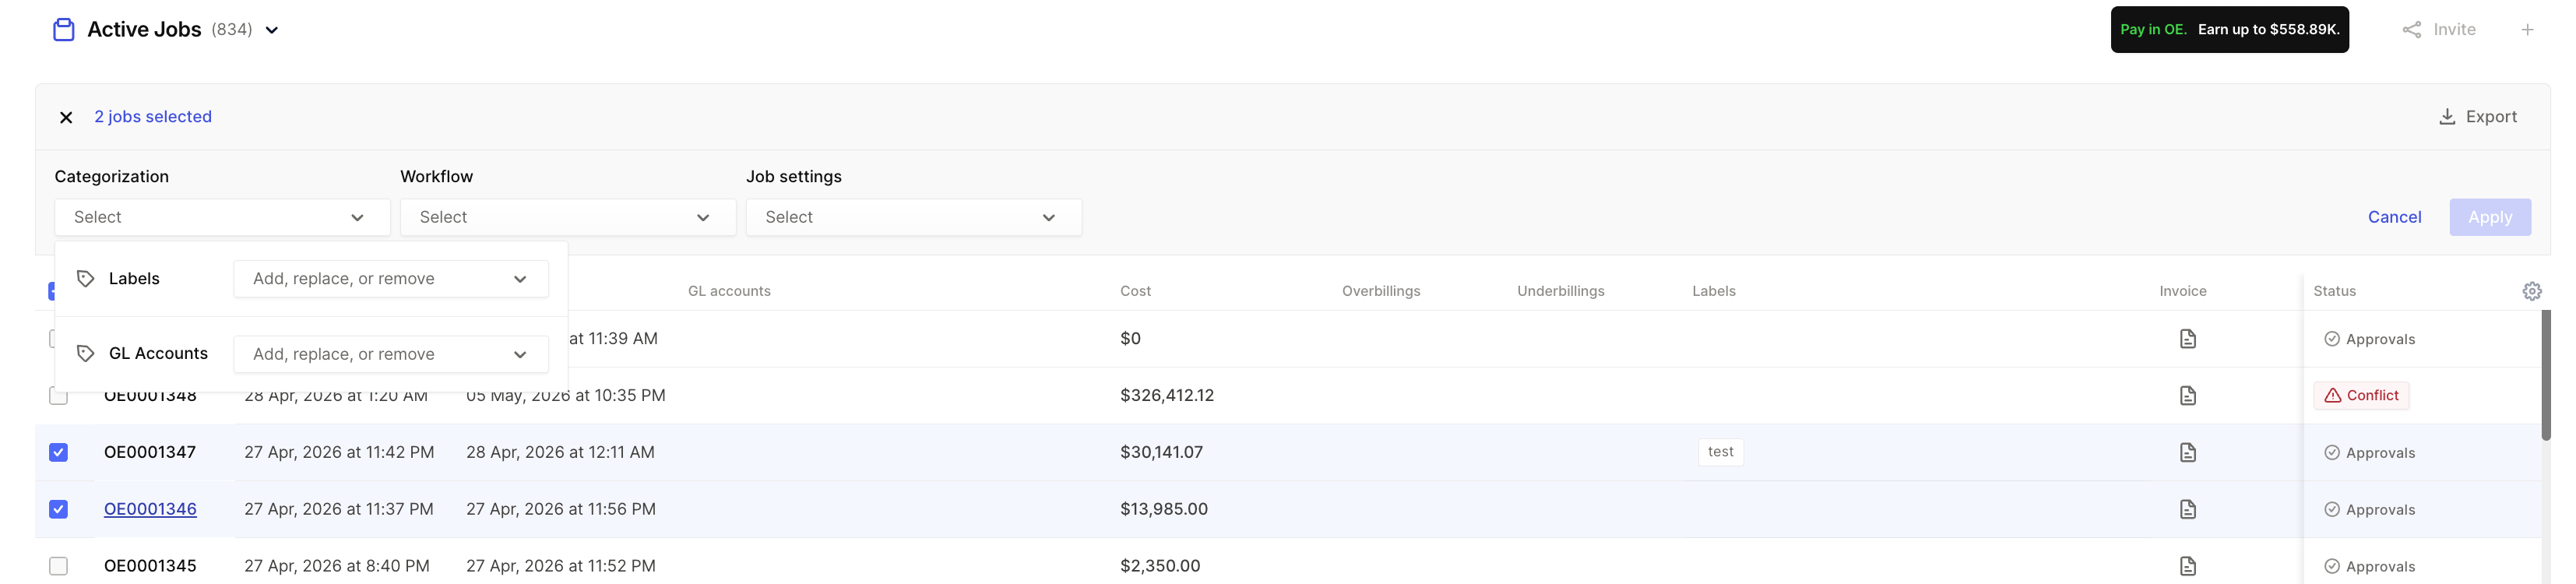
Step 2: Choose your changes
Open the section that matches what you need to update (see details below). You can make changes across multiple sections in one go.
Step 3: Apply
Once you've configured your changes, click the blue Apply button at the top right to execute.
Depending on the action and the number of jobs selected, bulk actions can take anywhere from a few seconds to a few minutes to complete.
Categorization
Use this section to update Labels and GL Accounts across your selected jobs.
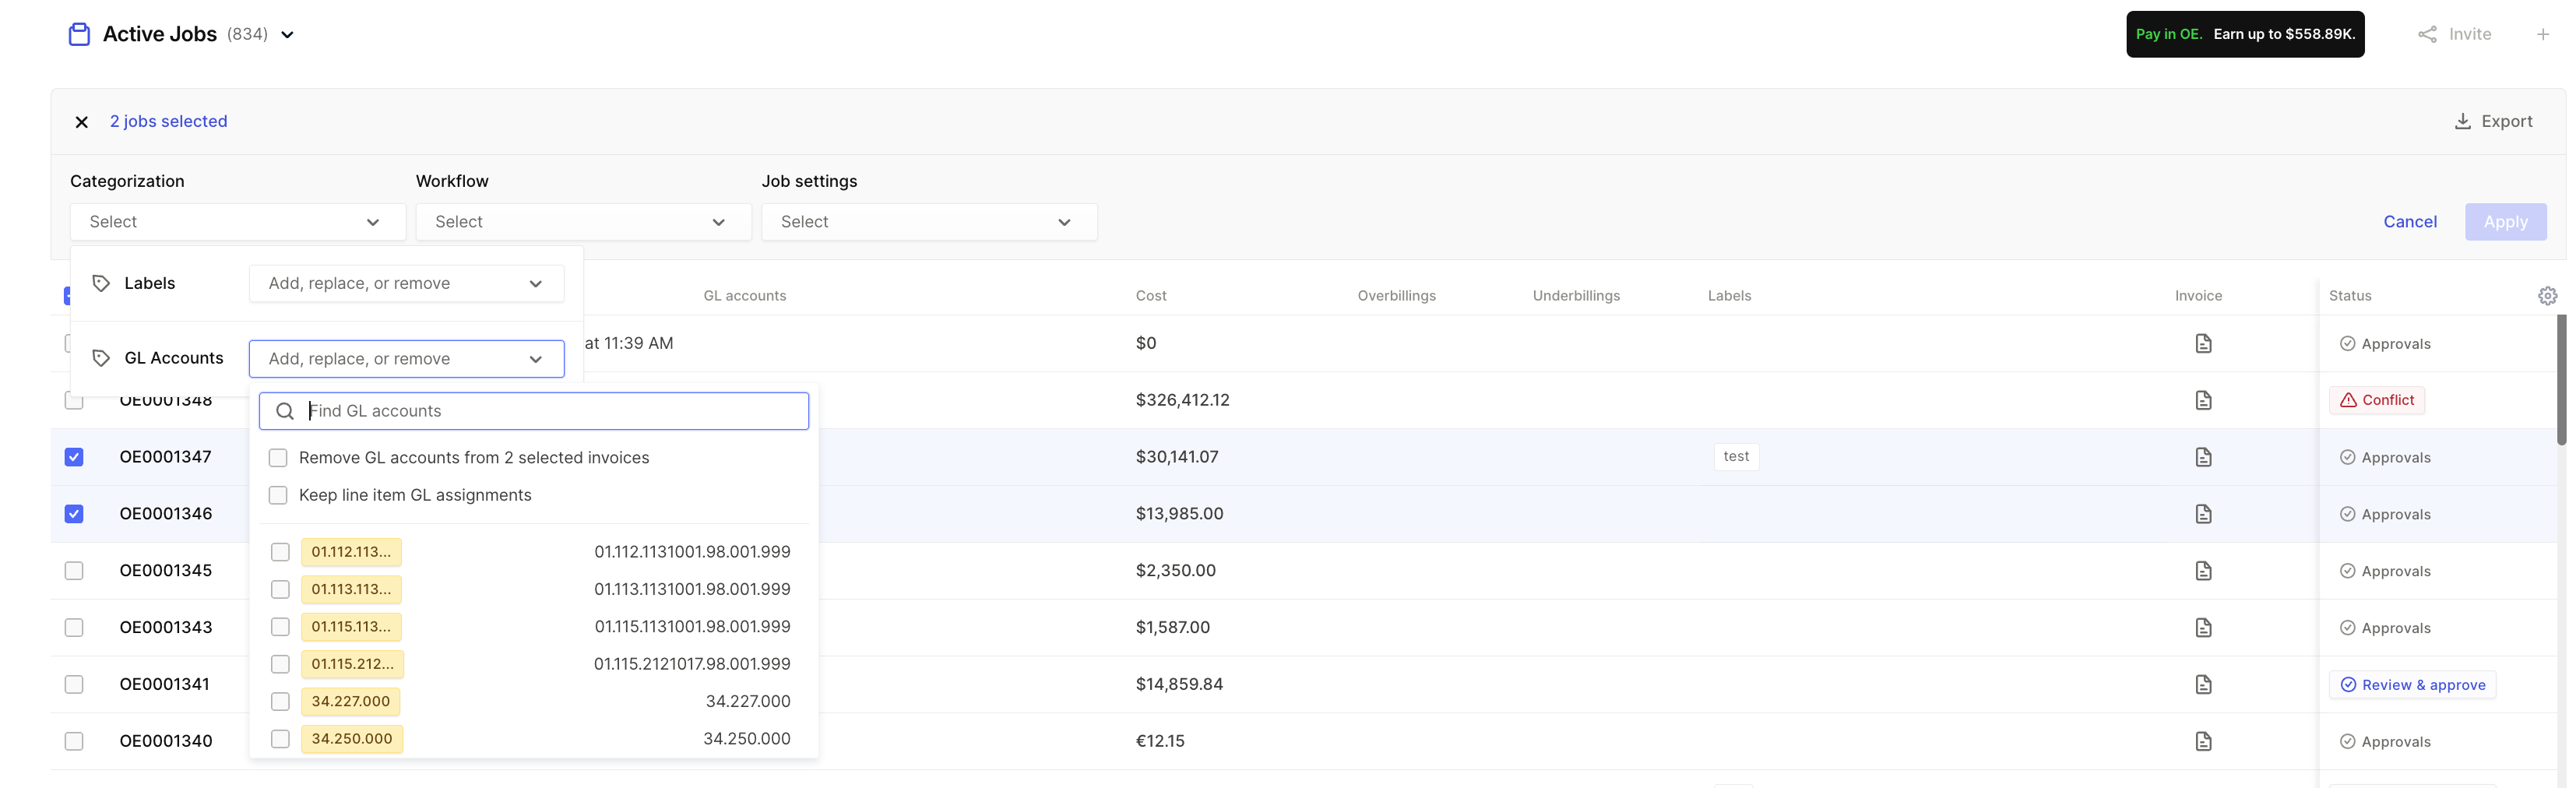
Labels
Click the Labels dropdown to add, replace, or remove labels on the selected jobs.
Add — Adds the selected label(s) to all chosen jobs without removing any existing labels
Replace — Replaces existing labels on the selected jobs with the label(s) you choose
Remove — Removes the specified label(s) from the selected jobs
GL Accounts
Click the GL Accounts dropdown to add, replace, or remove GL code assignments on the selected jobs.
Add — Adds the selected GL account(s)
Replace — Replaces existing GL assignments with the one(s) you choose
Remove — Removes the specified GL account(s)
Workflow
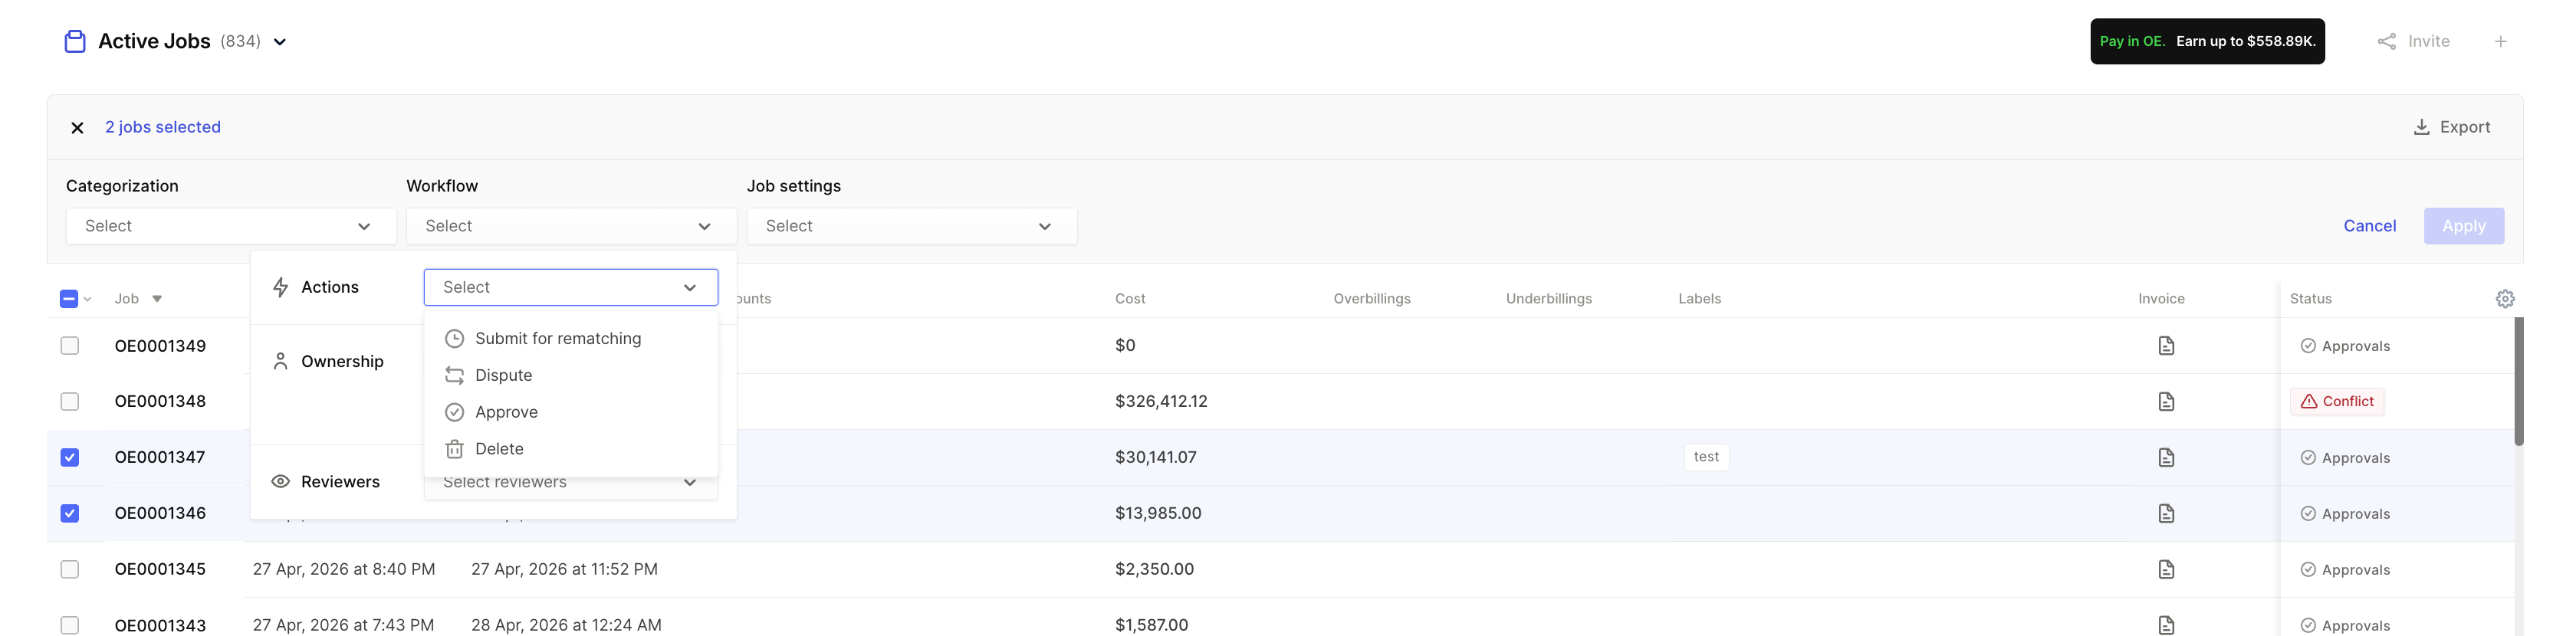
Use this section to perform actions on the selected jobs or to change ownership and reviewers.
Actions
Click the Actions dropdown to select one of the following:
Submit for rematching — Resubmits the selected jobs for matching. Useful after updating PO numbers, line items, or other job details
Dispute — Moves the selected jobs to Disputed status
Approve — Bulk-approves the selected jobs
Delete — Deletes the selected jobs
Ownership
Reassign the owner for all selected jobs. The new owner will receive priority status notifications for these jobs going forward.
Reviewers
Add or change the reviewers assigned to the selected jobs.
Job Settings
Use this section to update job-level metadata across the selected jobs.
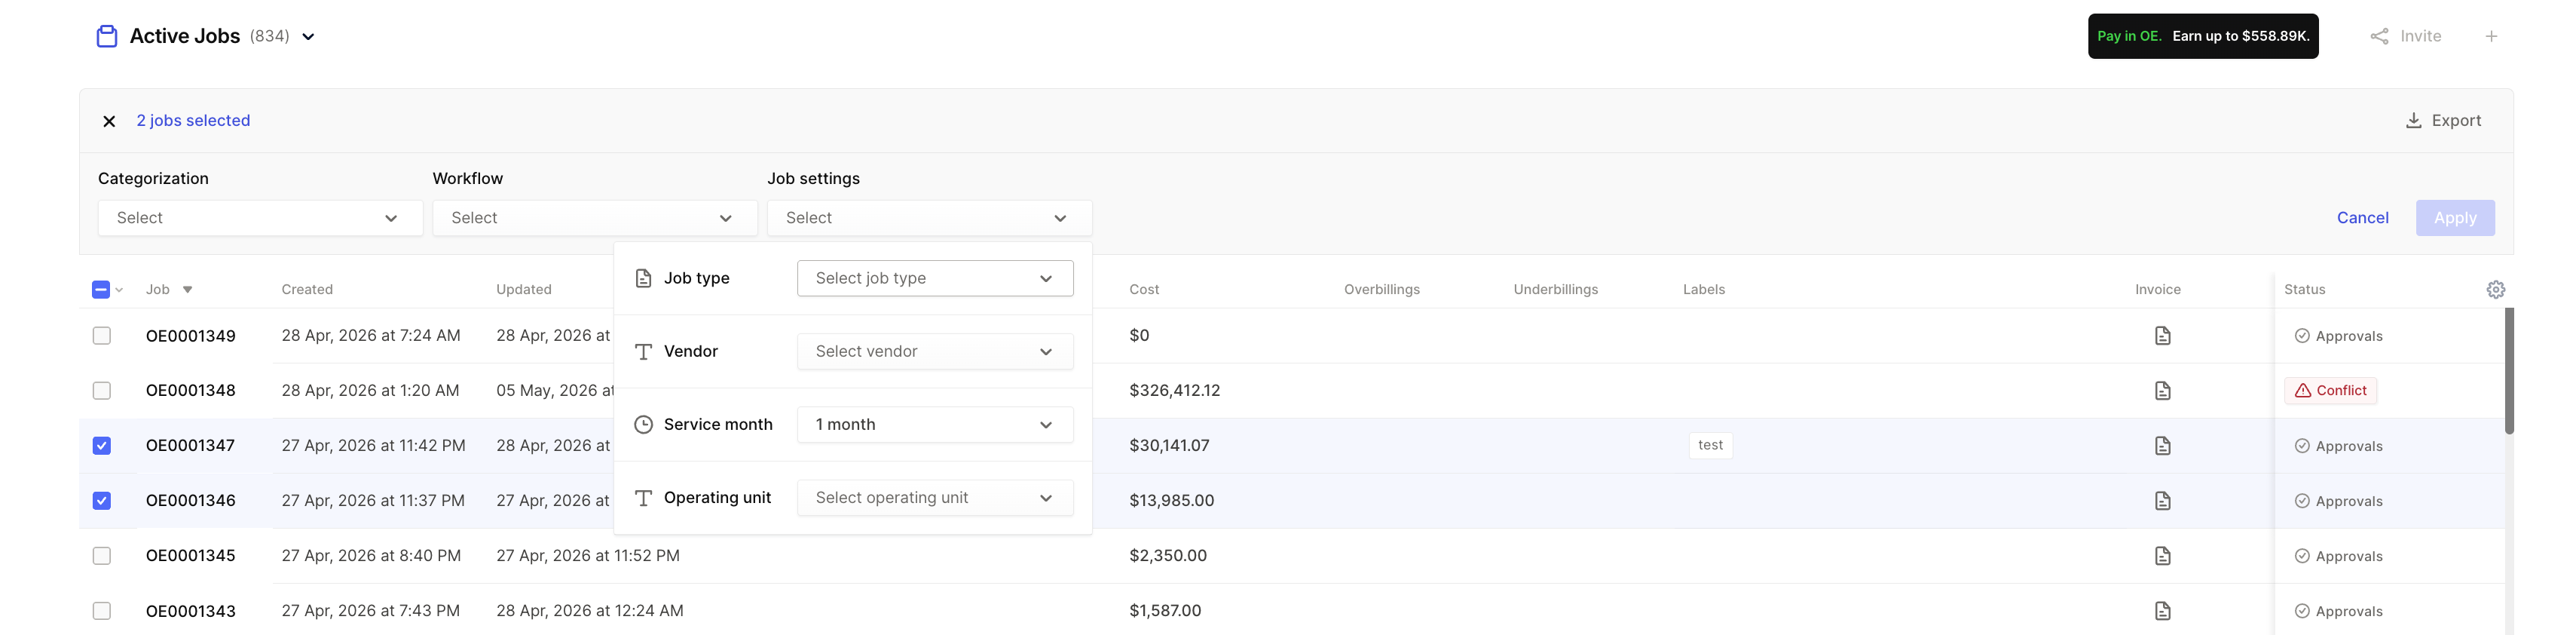
Job type — Change the job type for the selected jobs
Vendor — Assign or change the vendor
Service month — Update the service month
Operating unit — Assign or change the operating unit
Good to Know
Bulk actions apply to Active Jobs only. Completed jobs cannot be modified.
Processing time varies. A small batch (5–10 jobs) will complete in seconds. Larger selections (50+ jobs) may take a few minutes. You'll see a confirmation once the action completes.
Actions are logged. All changes made via bulk actions are recorded in each job's activity log for audit purposes.
You can combine changes. Configure updates across Categorization, Workflow, and Job Settings in a single pass before clicking Apply.
Admin access required. Certain bulk actions (like Approve or Delete) may require Admin-level permissions depending on your workspace configuration.
Common Use Cases
An approver has left the company and has 80+ jobs stuck in their queue.
Filter by status = Approvals, select all affected jobs, use Workflow → Ownership to reassign to the new approver in one step.
You need to add a GL code to a batch of invoices from the same vendor.
Filter by vendor, select the jobs, use Categorization → GL Accounts → Add to apply the correct GL code.
A batch of jobs needs to be resubmitted after a PO update.
Select the affected jobs, use Workflow → Actions → Submit for rematching.
Updating the service month across a set of recurring invoices.
Select the jobs, use Job Settings → Service month to update them all at once.
Need help? Contact support@openenvoy.com.