You can customize columns and filters on both the 'Active' and 'Completed' Job List Pages.
Learn how to:
Manage Column Settings
To customize columns in the Job List page start by clicking on the ⚙️ settings icon (to the right of column headers). This will expand a drop-down list of all the column headers available.
You can reorder these columns within this drop-down by dragging the respective column header up or down as desired. Please note: both the Job and Status columns are static and cannot be moved or changed.
To remove a column, toggle the blue slider (with the checkmark) next to the column header. The slider will turn gray confirming that the column is no longer visible. To reinstate a column, click on the gray slider next to the column header until it turns blue. The column will reappear on the Job List page. 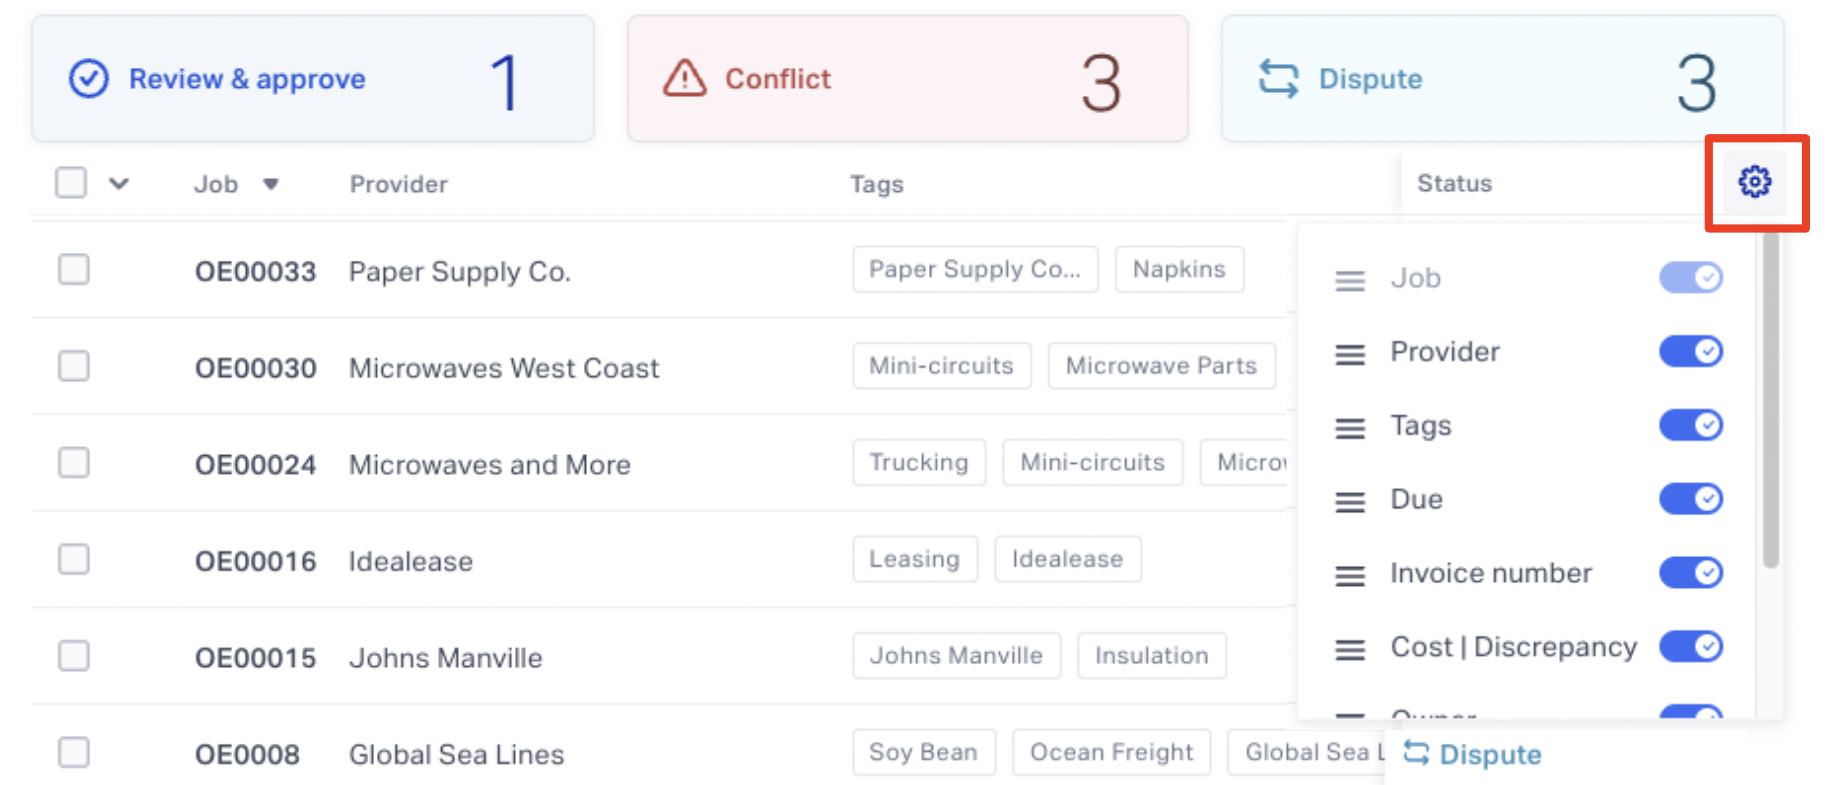
Column settings will remain static until the user makes a change.
Create Filters and View Filter Types
Filters allow you to view Jobs based on the criteria most relevant to you. The Job List page provides users with a robust filtering tool that allows you to create and save one or multiple filters or specific job criteria. Please note: When utilizing multiple filters the system will create an 'And' statement.
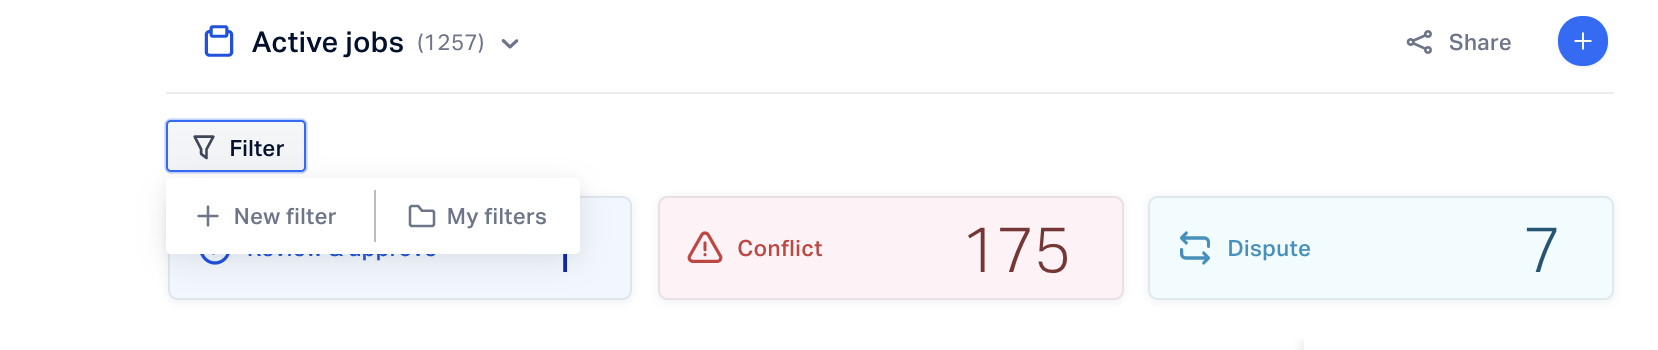
- To create a filter on the Job List page start by clicking the Filter button in the top left corner and then click the + New Filter button that appears.
- You can create a filter by selecting 1 (or more) of the following criteria:
- Created - the date that a job was created in the system. You can select “Is before”, “Is after”, "Is between" or "Is" and choose the appropriate timeframe.
- Vendor - the specific name of the vendor(s). You can select "Has any of" or "Has none of" and select the vendor(s).
-
- Labels - the categorizations given to the user's jobs. You can select "Has any of", "Has none of" or "Has all of" and select the label(s).
-
- Status - the specific status of a job post matching process. You can select "Has any of" or "Has none of" and select the label(s).
-
- Owner - the specific owner of the job. You can select "Has any of" or "Has none of" and select the owner(s).
- Team - the team owner of the job. You can select "Has any of" or "Has none of" and select the team(s).
- Cost - view jobs by specific cost value criteria. You can select "Is greater than”, “Is less than”, or “Is” and enter the dollar amount.
- Overbilling - view jobs by specific overbilling value criteria. You can select "Is greater than", "Is less than", or "Is" and enter the dollar amount.
- Underbilling - view jobs by specific underbilling value criteria. You can select "Is greater than", Is less than", or "Is" and enter the dollar amount.
- Due - view jobs by specific due dates. You can select "Is after, "Is before", "Is between", or "Is empty" and select the appropriate time frame.
- Invoice number - view jobs by specific invoice number. You can select "Is" or "Is empty" and enter the invoice number.
- Service month - view jobs from specific service months. This is a media industry specific field. You can select "Has any of" and select the appropriate month(s).
- GL accounts - view jobs by specific GL account or with no GL account. You can select "Has any of" or "Has none of" and select the GL account(s) or select "Jobs with no GL account".
- Type - view jobs by type. You can select "Is" and either "Basic expense" or "Match expense".
- Vendor ID - view jobs by Vendor ID. This is a customer-specific field.
- Location ID - view jobs by Location ID. This is a customer-specific field.
To create an additional filter, click the Add Filter button. When finished creating filters, click the white space on the Job List page to view updated results.
The Filter button in the top right corner will show a number indicating how many filters are currently in place. To remove a filter, click the “x” next to it. To clear all filters, click Clear Filters.
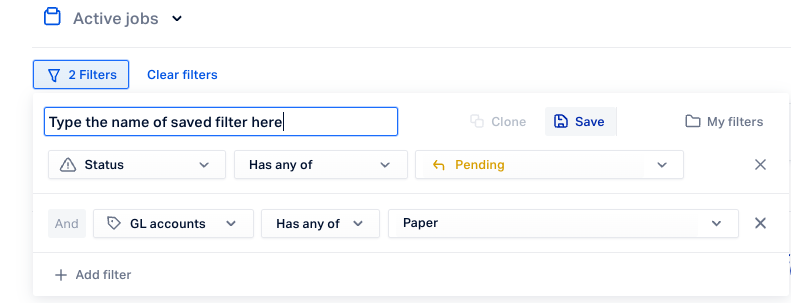
Create a Saved Filter
You can save frequently used filters that were created on the Job List page for later use. Any filter that has been saved will appear in the "My filters" section of the filter menu (example below). You can create a copy of a frequently used filter to add additional fields if needed.
To save a filter, select the fields and number of filters desired (see How to Create Filters section) and then click the "Save" button in the filter menu.