
A complete guide from dispute initiation to resolution:
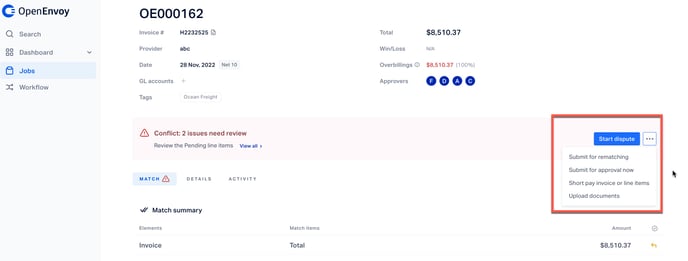
When a job is in Conflict status related to an overbilling, you have the option to initiate a Dispute. Click on your job and view the job details page. You will see a red banner prompting, "Start dispute". Click the three dots to the right if you would like to bypass the dispute and submit for approval along with other options to submit for rematching, short pay or upload additional documents. This tutorial focuses on the "Yes, dispute" option.
Start the Dispute
When "Start dispute" is selected, a pop-up box will appear.
From the drop-down, you can select Yes, No, or Skipped Dispute. Let's walk through each option.
If Yes is selected, this indicates you wish to dispute the full identified overbilling, and the full amount appears in the Amount disputed field.
You have the option to enter a note for the dispute, then click "Done". The job will be placed in Dispute status. This status is to help you resolve the dispute status quickly and also alert other users who may be able to view the job that the job is in the dispute process.
If No is selected, a new field will appear where you can type the exact dispute amount, which will appear in the "Amount disputed" field.
You have the option to enter a note for the dispute, then click "Done". The job will be placed in Dispute status. This status is to help you resolve the dispute status quickly and also alert other users who may be able to view the job that the job is in the dispute process.
If Skipped dispute is selected, the Amount disputed field will default to N/A.
Once 'Done' is selected, you will now be able to submit for approval.
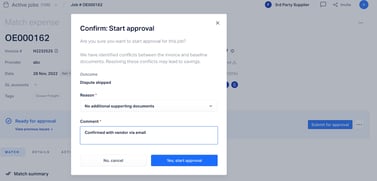
If a user with Approver permission selects this job and clicks the "Submit for approval" button, they will see an option to click Ok, review & approve.
A confirmation box to submit for approval for the job will appear, which indicates the dispute results haven't been verified. The approver can select a reason from the drop down and is required to enter a comment:
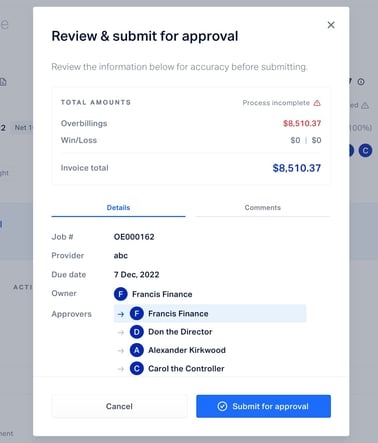
If there is a multi-level approval workflow, the following final approval confirmation display provides an approval summary, where if there were an additional approver, they could provide a comment and click Submit for approval.
Once the job is eventually approved, the status will change to "Approved", and the job will be viewable under the Completed job list.
Enter Dispute Results
Once you have the results of the dispute, follow these steps to record the results. Remember, all actions taken in the system will be recorded as part of a job's history, so you'll always have context of what occurred.
Click into the job with the Dispute status, and view the Job Details page. You'll see a blue highlighted note indicating a dispute is in progress, with an option to click Enter Results.
You are presented with three options:
- Win: Resolved the full amount disputed
- Partial loss: Resolved for less than full amount disputed
- Loss: Dispute rejected by vendor
Select the option which matches the dispute result and click next.
Win: Resolved the full amount disputed
If this option is selected and you click Next, you may enter additional information on the next screen:
View the dispute results summary, enter the date the dispute was closed, and indicate how the dispute was resolved via the picklist: Revised invoice, Refund/reimbursement, Credit, Charge reversed.
If you received a final invoice, you may upload it to further document the dispute results.
By default, the final invoice will not be re-audited. We recommend only using the re-audit option if the final invoice contains major revisions. Learn more about the Final invoice: Re-audit option.
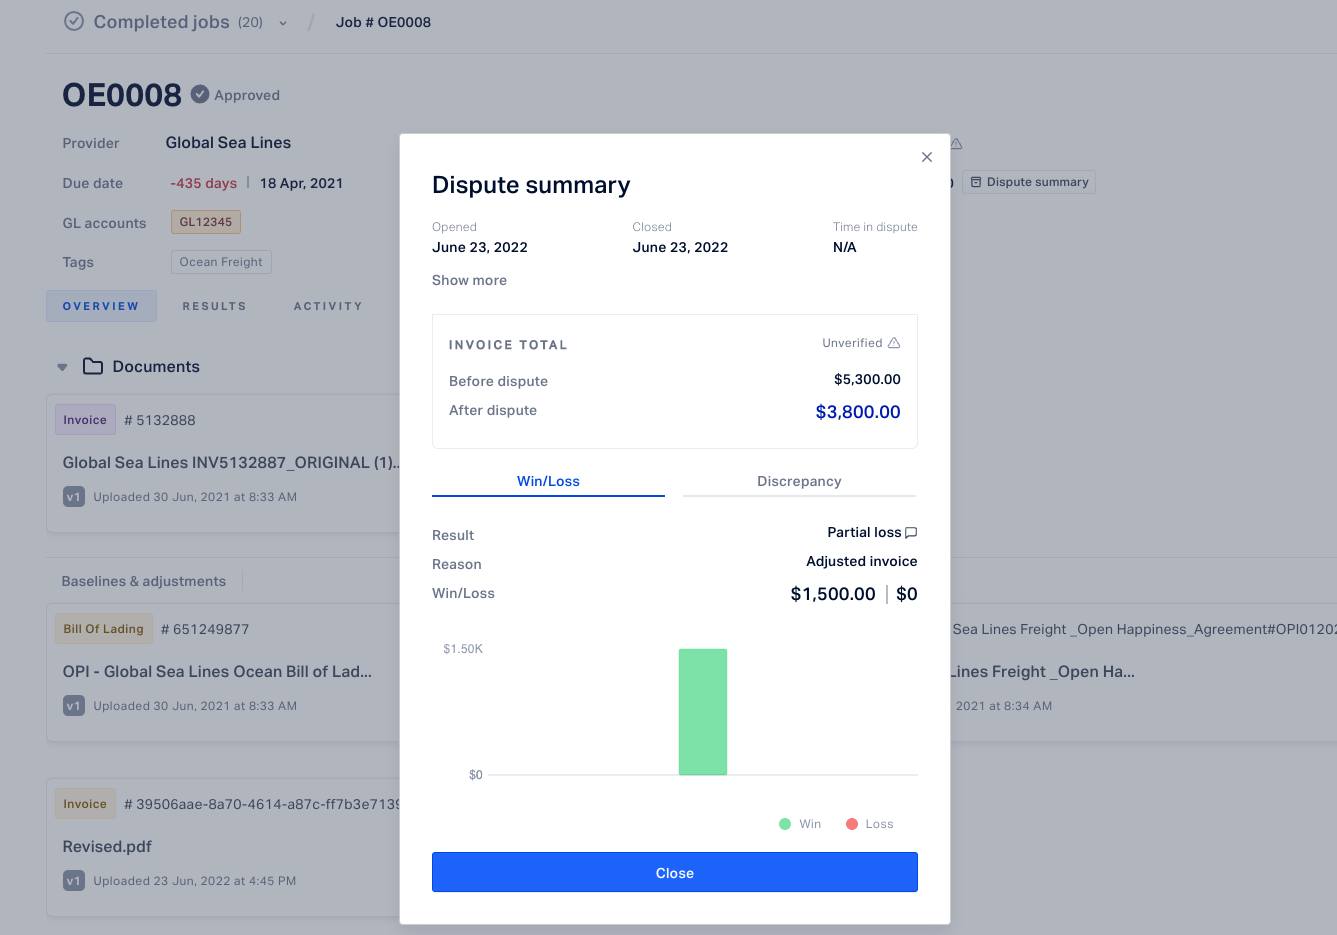
Once finished, click Done. You'll see a Dispute Summary display with final results, which are aggregated on the Spend Insights - Disputes dashboard.
Partial loss: Resolved for less than full amount disputed
If this option is selected and you click Next, you may enter additional information on the next screen:
View the dispute results summary, enter the date the dispute was closed, and indicate how the dispute was resolved via the picklist: Revised invoice, Refund/reimbursement, Credit, Charge reversed. You may indicate if the final amount is via a revised invoice or amount won, and enter the amount.
If you received a final invoice, you may upload it to further document the dispute results.
By default, the final invoice will not be re-audited. We recommend only using the re-audit option if the final invoice contains major revisions. Learn more about the Final invoice: Re-audit option.
Once finished, click Done. You'll see a Dispute Summary display with final results, which are aggregated on the Spend Insights - Disputes dashboard.
Loss: Dispute rejected by vendor
This option provides the opportunity to record notes to document the dispute results.
Once finished, click Done. You'll see a Dispute Summary displayed of the final results, which are aggregated on the Spend Insights - Disputes dashboard.
Final Invoice: Option to Re-Audit
If you elected to upload a final invoice as part of the dispute resolution, you have the option to prompt a re-audit of the final invoice.
OpenEnvoy doesn't recommend selecting the re-audit option unless major revisions are expected, as the re-audit will be subject to SLA and may cause delay of the payment approval.
- If you would like a re-audit, check the "Verify final documents (re-audit)" box.
Important: If re-audit is selected, the presumption is the final invoice + dispute results match. It is the user's responsibility to double-check the final invoice amount and the information reflected in the dispute result summary match. If not, a conflict will be triggered during the re-audit process.
- If you want to skip the re-audit, do not check the "Verify final documents (re-audit)" box.
If a re-audit was selected, you'll see a confirmation message that the final documents are being verified. The job will change to Verifying status, which means the matching process has started with the new invoice. The invoice section of the job will indicate a new version of the revised invoice.
- If there's a match - the job will be placed into Ready to Approve status with the associated approval workflow.
- If an overbilling is found between the new invoice and baseline documents, the job will be placed in Conflict status. You will have two options:
- Accept revised results and Approve the job, or
- Start a new dispute with the new overbilling results from the revised invoice.
Dispute is now Complete
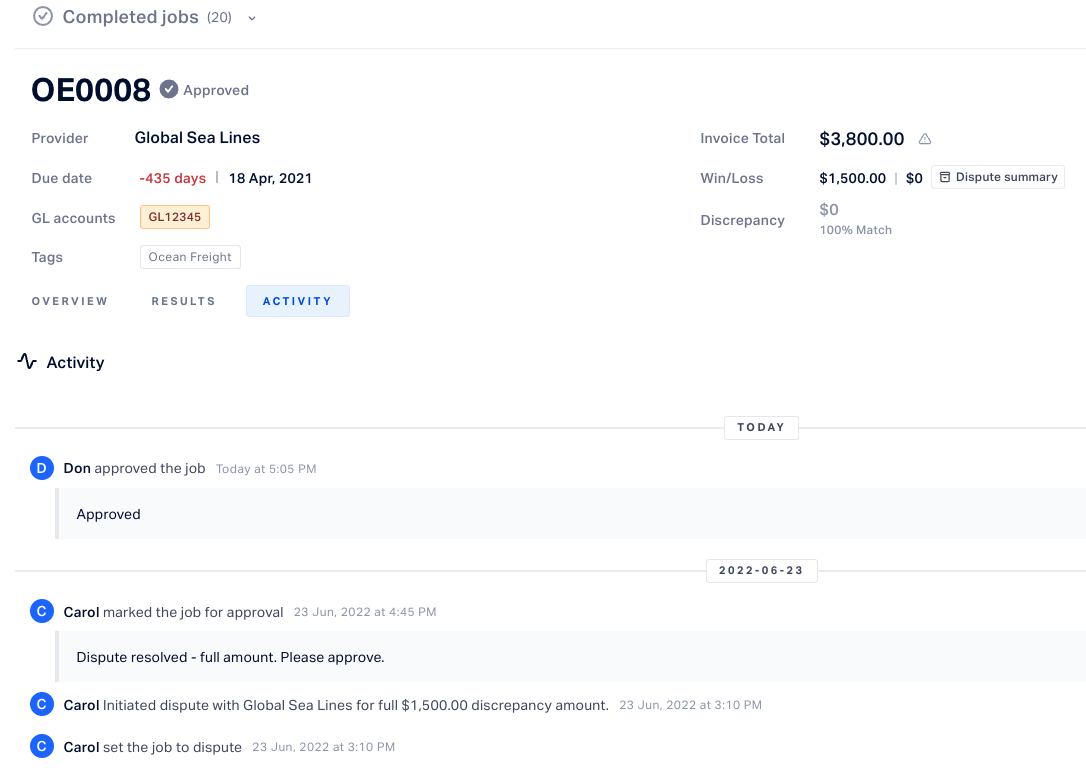
Once the job has been verified (as a result of the new documentation uploaded), you'll see that your job is already marked as Completed with Approved status. The job results can be viewed, such as the overbilling which has been recovered, all documents associated with the job, and any activity related to the job in the Activity tab.
Create a Dispute Report
You may create and export a Dispute Report to share with internal teams or Vendors.
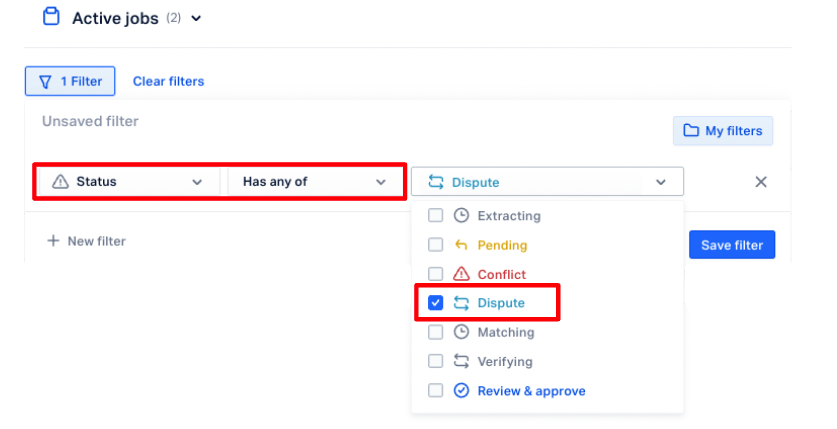
From the Job List view, create a Filter:
Select Status, then select "Has any of" and check "Dispute".
From here, you can add additional filters.
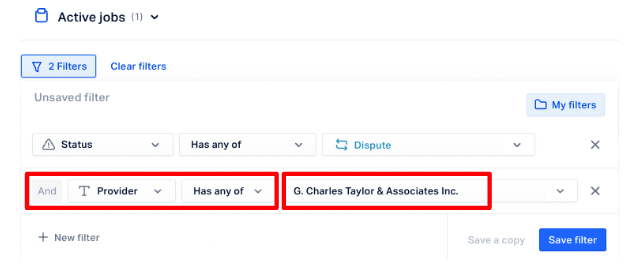
For example, if you want a report showing only open disputes by one vendor, add a second filter:
Select Vendor, then "Has any of" and enter the Vendor name.
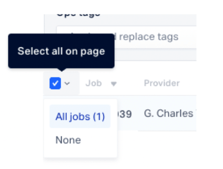
Once your filter(s) has the criteria you want, you can use the Bulk Edit function to select some or all of the jobs in the Jobs List view, depending on what you want to include in the report.
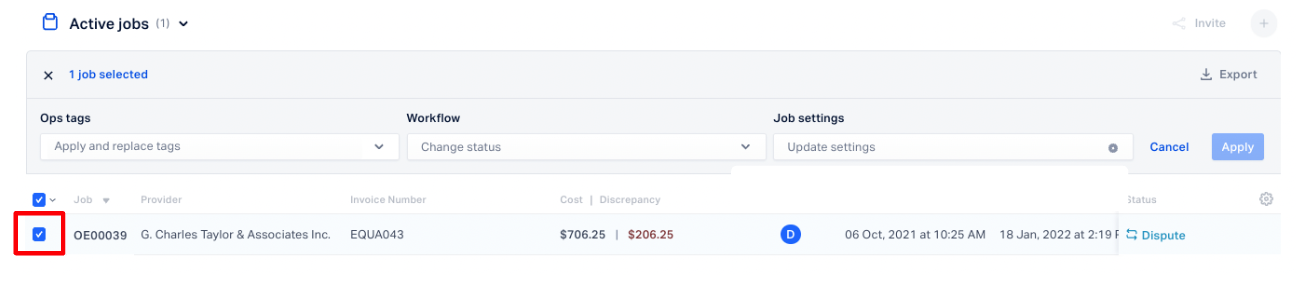
Here's how you can select 'All Jobs' returned by the filter(s):
Next, click the Export button in the top right, which will give you two options:
- Match Results - contains all the dispute details, such as:
- Invoice Number, Invoice Amount, Dispute Amount, Overbilling, Vendor Name
- We recommend the Match Results option for sending a dispute report.
- Job Data - contains all the job details, such as:
- Invoice Number, Cost | Overbilling amount, Job Owner, Status
- We recommend the Job Data option for an internal team report.
Select the appropriate option, click the blue "OK" button, 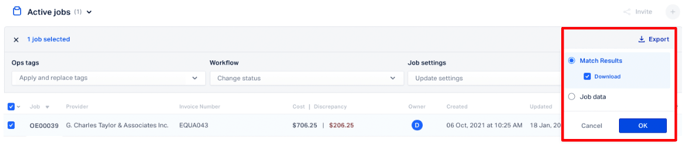
A .csv report will be immediately downloaded and available for you to modify or save as another file format.